How to Add Automatic Page Numbers in Canva
Discover how to automate this tedious task of adding page numbers with just a few clicks. For lengthy documents, page numbers are essential for navigation and organization. At its core, Canva's automatic page numbering feature operates on a simple yet powerful principle: dynamic elements. Instead of manually typing in each page number, you insert a special element that Canva automatically updates as you add or remove pages. Essentially, Canva takes the manual labor out of page numbering, allowing you to focus on the creative aspects of your design while ensuring your document remains organized and professional.
Accessing the page number feature in Canva is straightforward. Here's how you can find it:
Accessing the Page Number Feature:
Start by opening your Canva design.
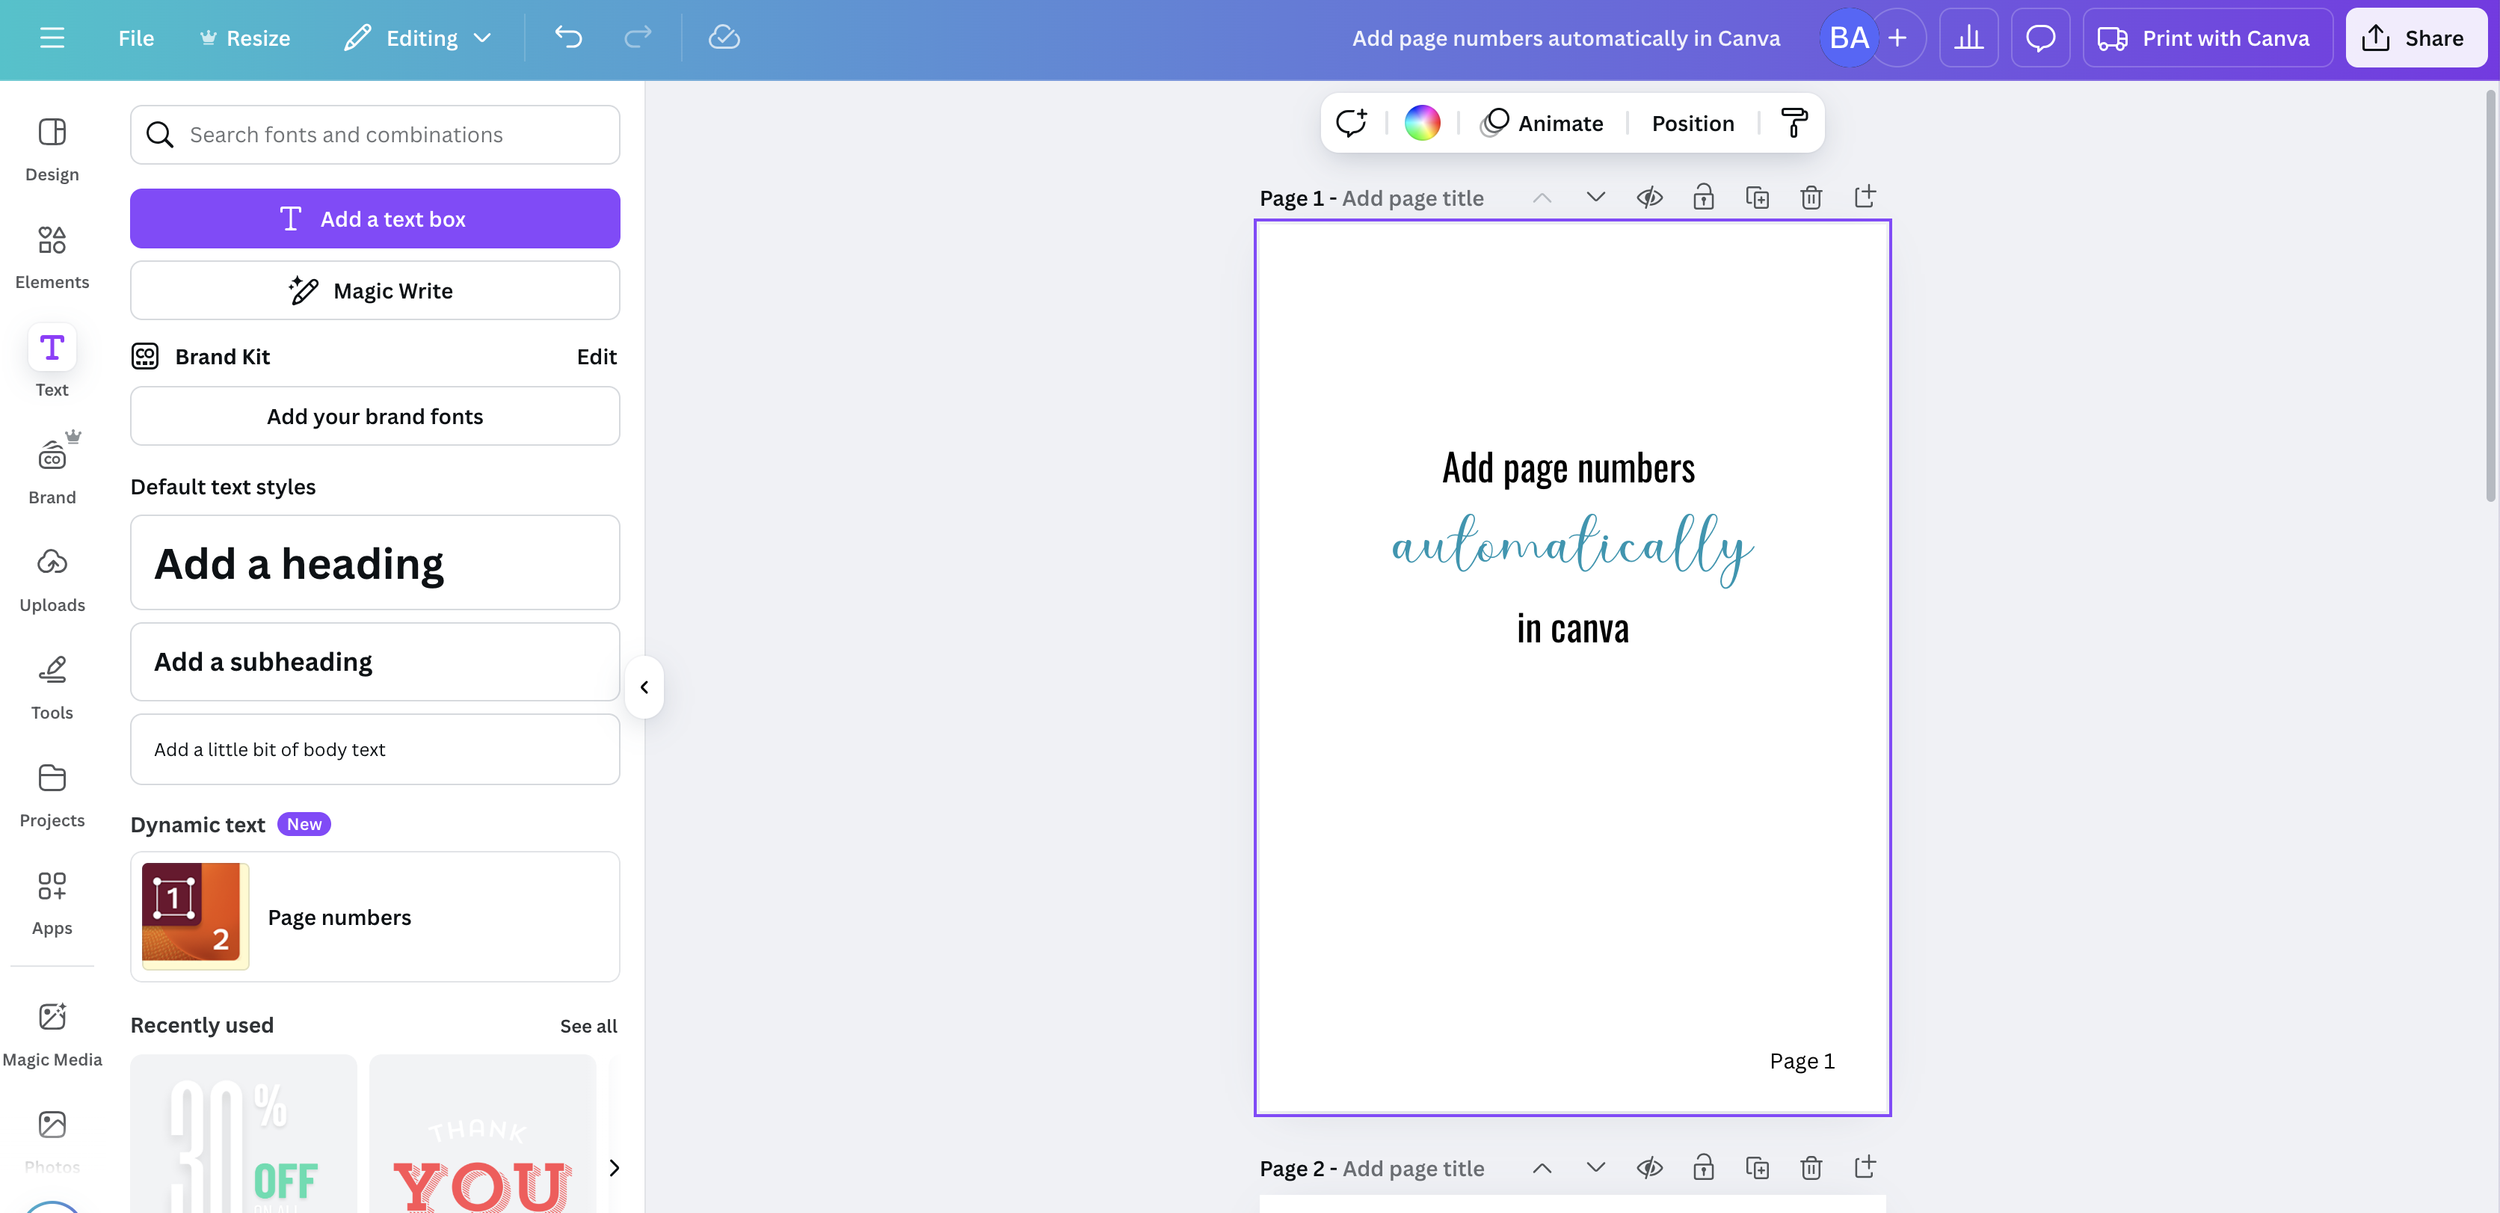
On the left-hand side of the Canva editor, you'll see a toolbar with various options. Click on the "Text" tab.
Under the “Dynamic Text” section, select “Page Numbers”
The page number will be automatically added to the lower right corner of every page.
Customizing the Page Numbers:
To truly integrate it seamlessly into your design, you'll want to customize its appearance. Here's how to make those page numbers your own:
1. Page Numbers Tab
Format: Choose to display the page number only, Page + number or Page x of y.
Show numbers on: Choose which pages to show the page numbers on. This is useful if you have a cover page and would like the page numbers to start on the next page.
Appearance and Position: Style the page numbers and position on one page and click the “Apply properties to all pages” button to apply your styling to all page numbers
2. Font, Size, and Color:
Select the Element: Click on the page number element you've placed on your page.
Text Editing Toolbar: A text editing toolbar will appear at the top of the Canva editor.
Font: Use the font dropdown menu to choose a font that complements your design.
Size: Adjust the font size using the number input or the plus/minus buttons.
Color: Click on the color swatch to select a color that matches your design's color palette.
3. Styling:
Bold, Italic, Underline: Use the B, I, and U buttons to apply bold, italic, or underline styling.
Alignment: If your page numbers are part of a larger text block, you can adjust the alignment (left, center, right).
Spacing: Adjust the letter and line spacing if needed to improve readability.
4. Position and Placement:
Drag and Drop: Click and drag the page number element to fine-tune its position on the page.
Alignment Tools: Use Canva's alignment tools (Arrange > Align) to ensure the element is perfectly aligned with other elements on the page.
Margins: Ensure that the page numbers are within your document's margins to prevent them from being cut off when printed.
5. Adding Styling Elements:
Adding a shape behind the page number: You can add a shape from the element section, and place it behind the page number element, to add a background to the page number.
Adding lines or other elements: You can add lines or small design elements around the page number to further enhance its appearance.
*Make sure to apply customization to all page numbers: After customizing, click the “Apply properties to all pages” button in the Page Numbers tab to apply your styling to all page numbers
Mastering automatic page numbering in Canva is a simple yet powerful way to enhance your design workflow and create professional-looking documents. By following the steps outlined in this guide, you can effortlessly add and customize page numbers, saving valuable time and minimizing the risk of errors.

