Transparent Photo Overlay Text Effect in Canva
This transparent text photo overlay is a fantastic way to make your images stand out. Today, I'll walk you through a simple method using Canva to achieve an effect like the examples below. Here is your step by step guide!
1. Set Up Your Text
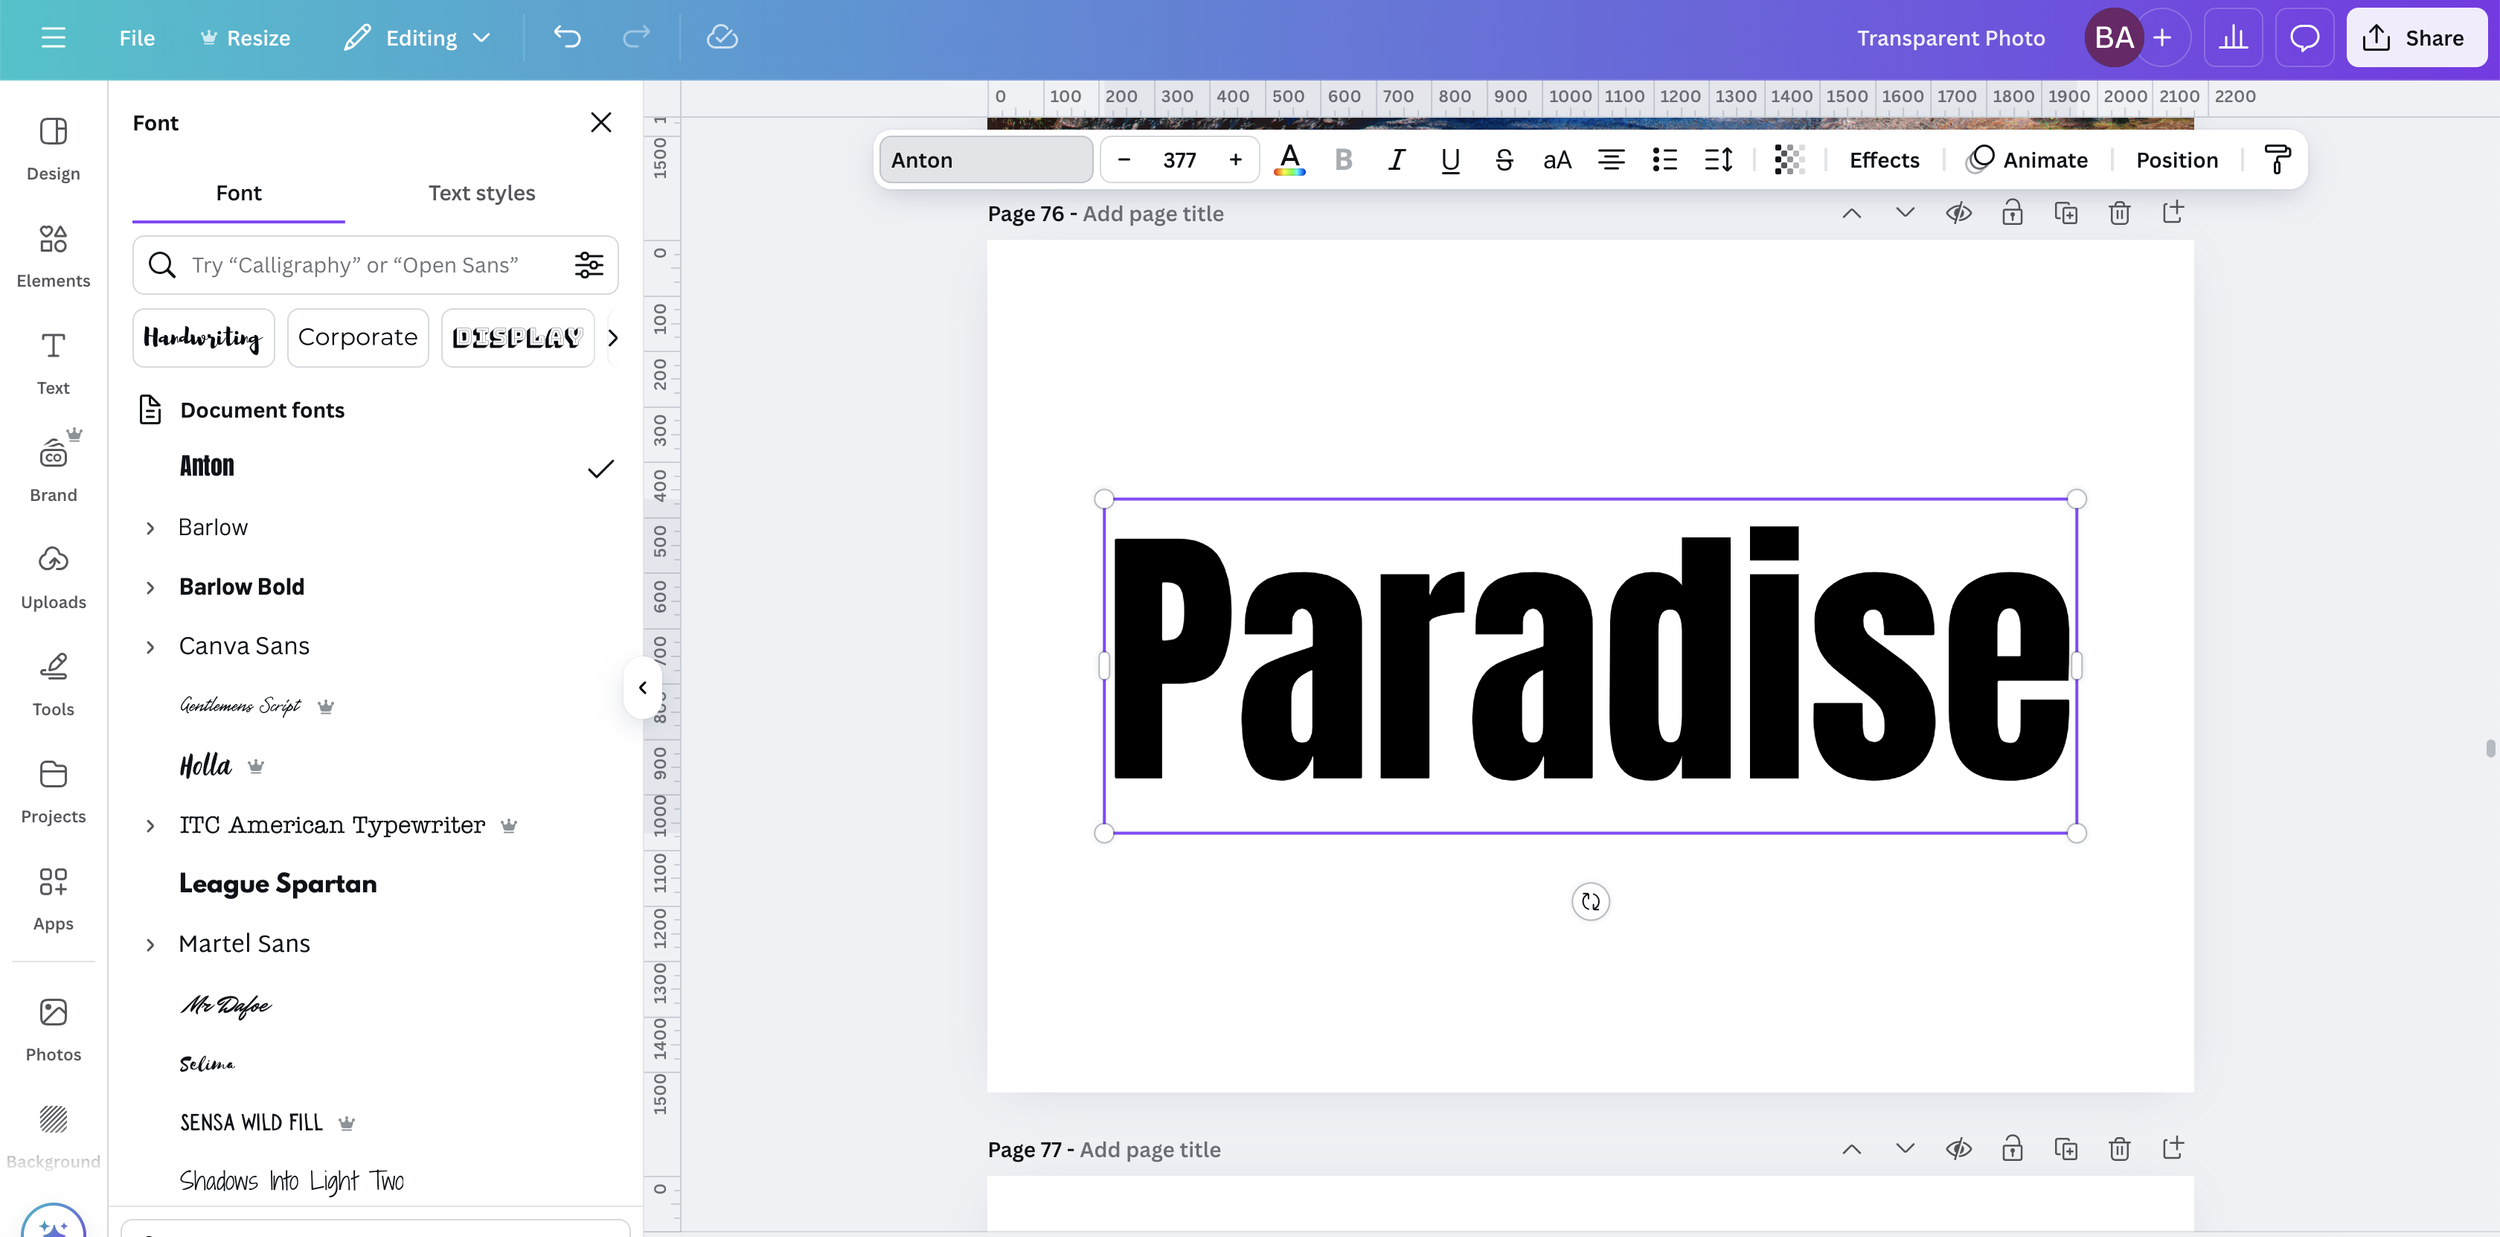
Add your text to a blank page in Canva. Choose your desired font, font size, and position. The position on the page will be the same position as the text when placed on top of the image.
2. Turn Your Text White
Select your text and change its color to white. This is crucial for the effect to work properly.
3. Apply the "Lift" Effect
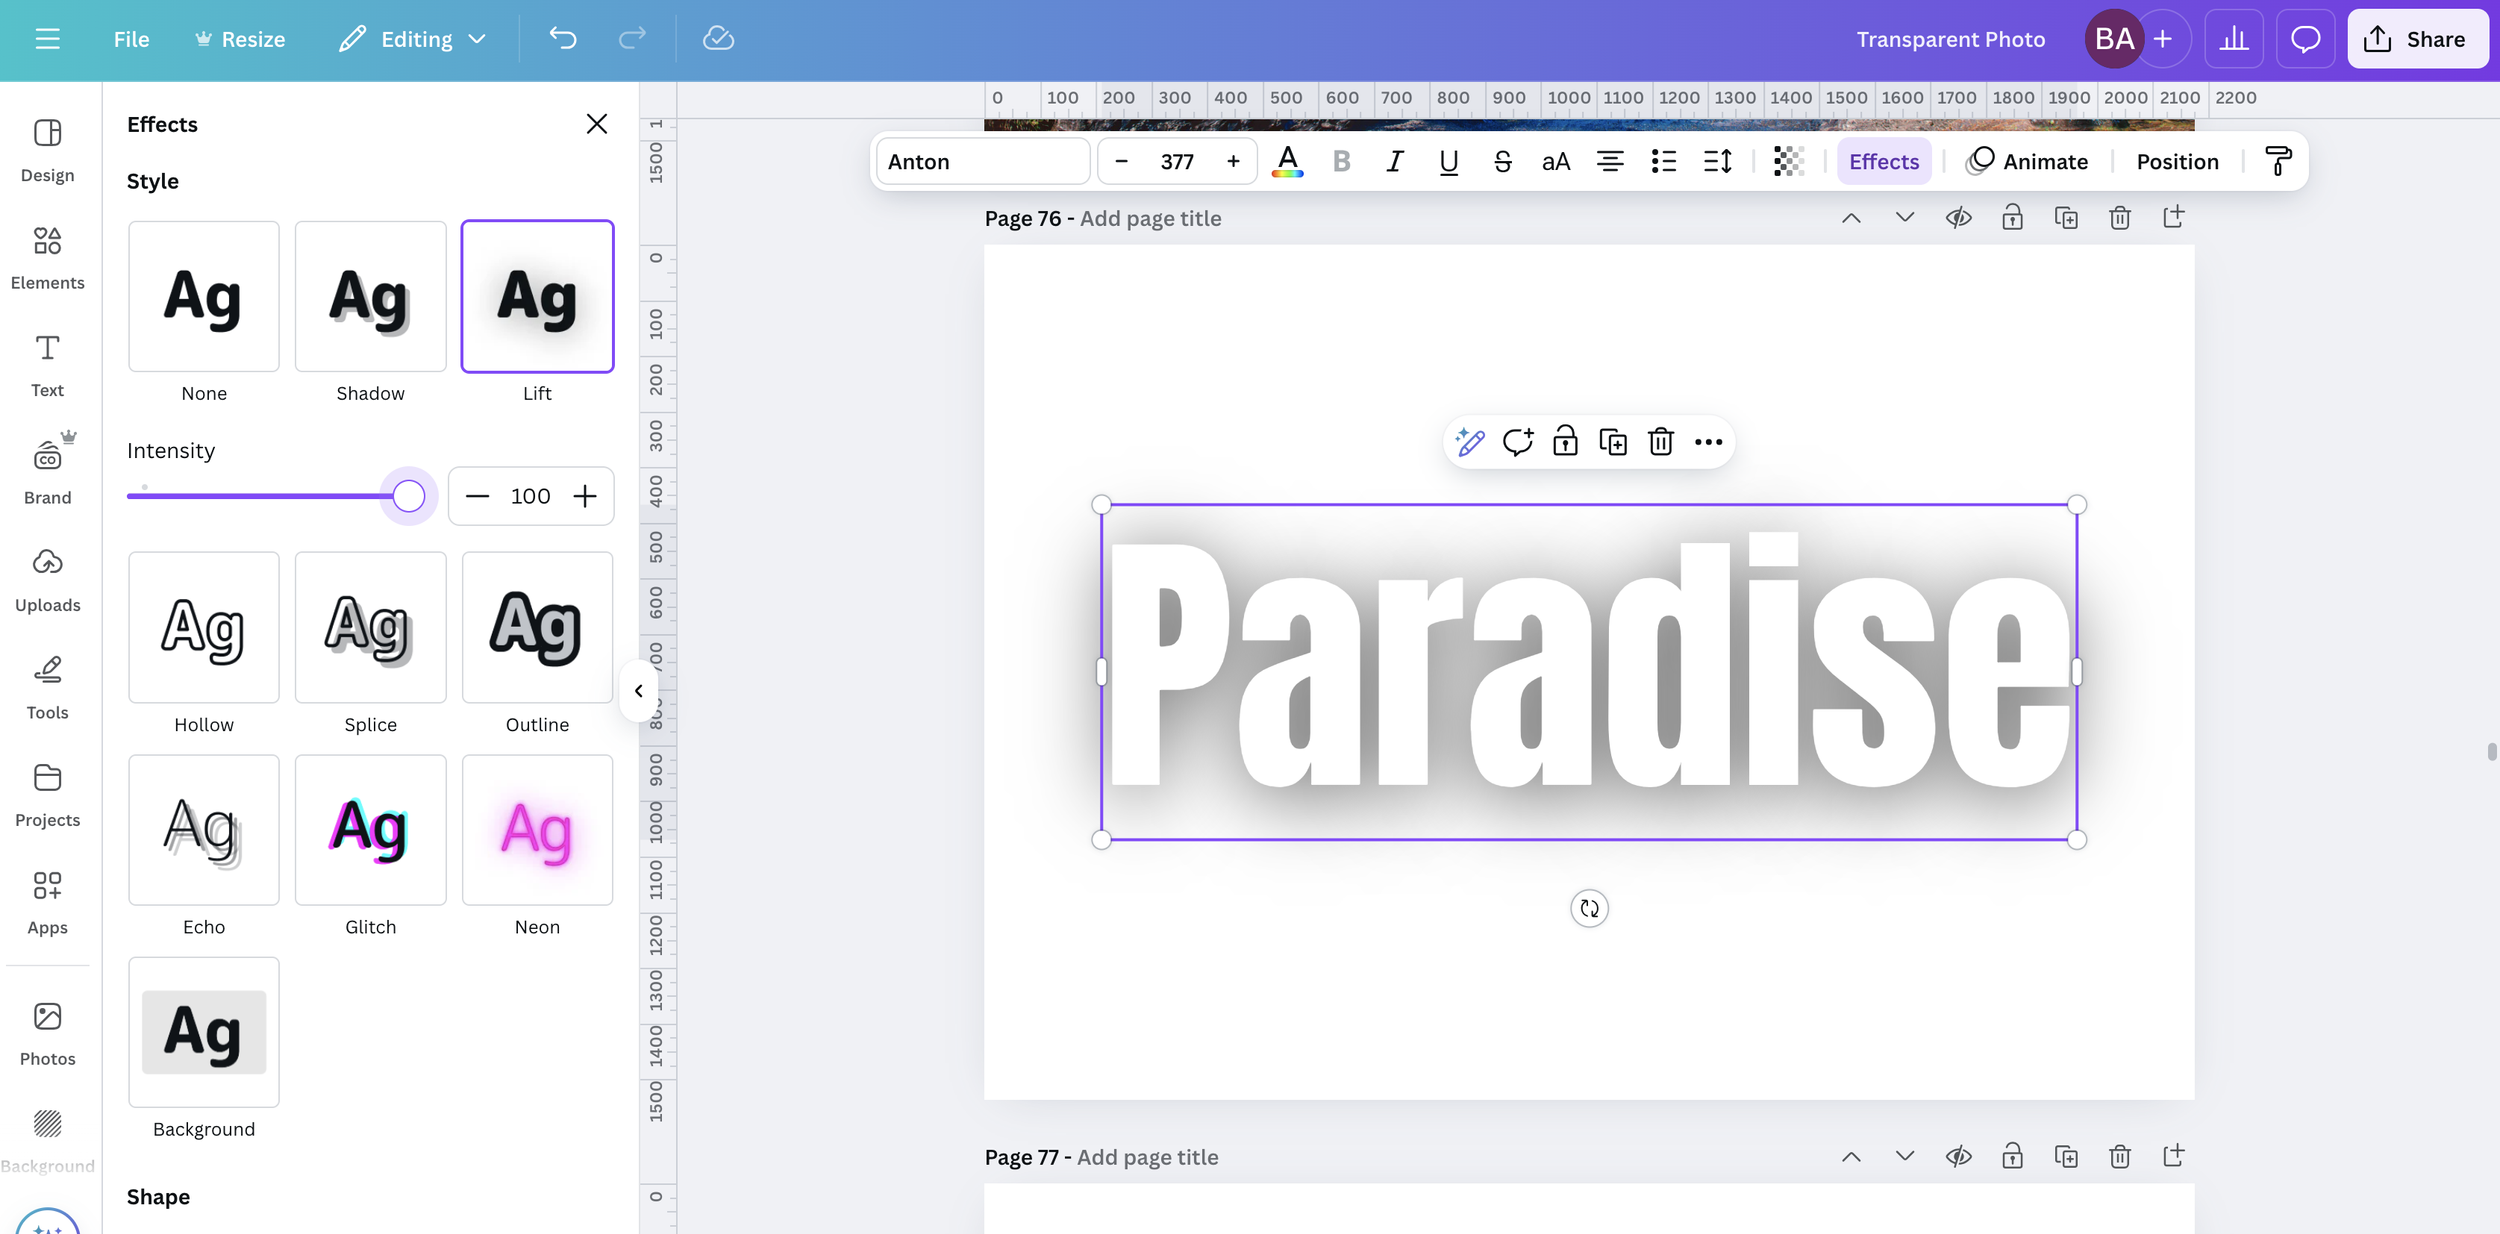
With your text still selected, click on "Effects" in the top toolbar.
Choose the "Lift" effect.
Increase the intensity of the lift to 100%. This creates a strong shadow behind your text.
4. Darken the Shadow (Optional but Recommended)
Duplicate the text layer.
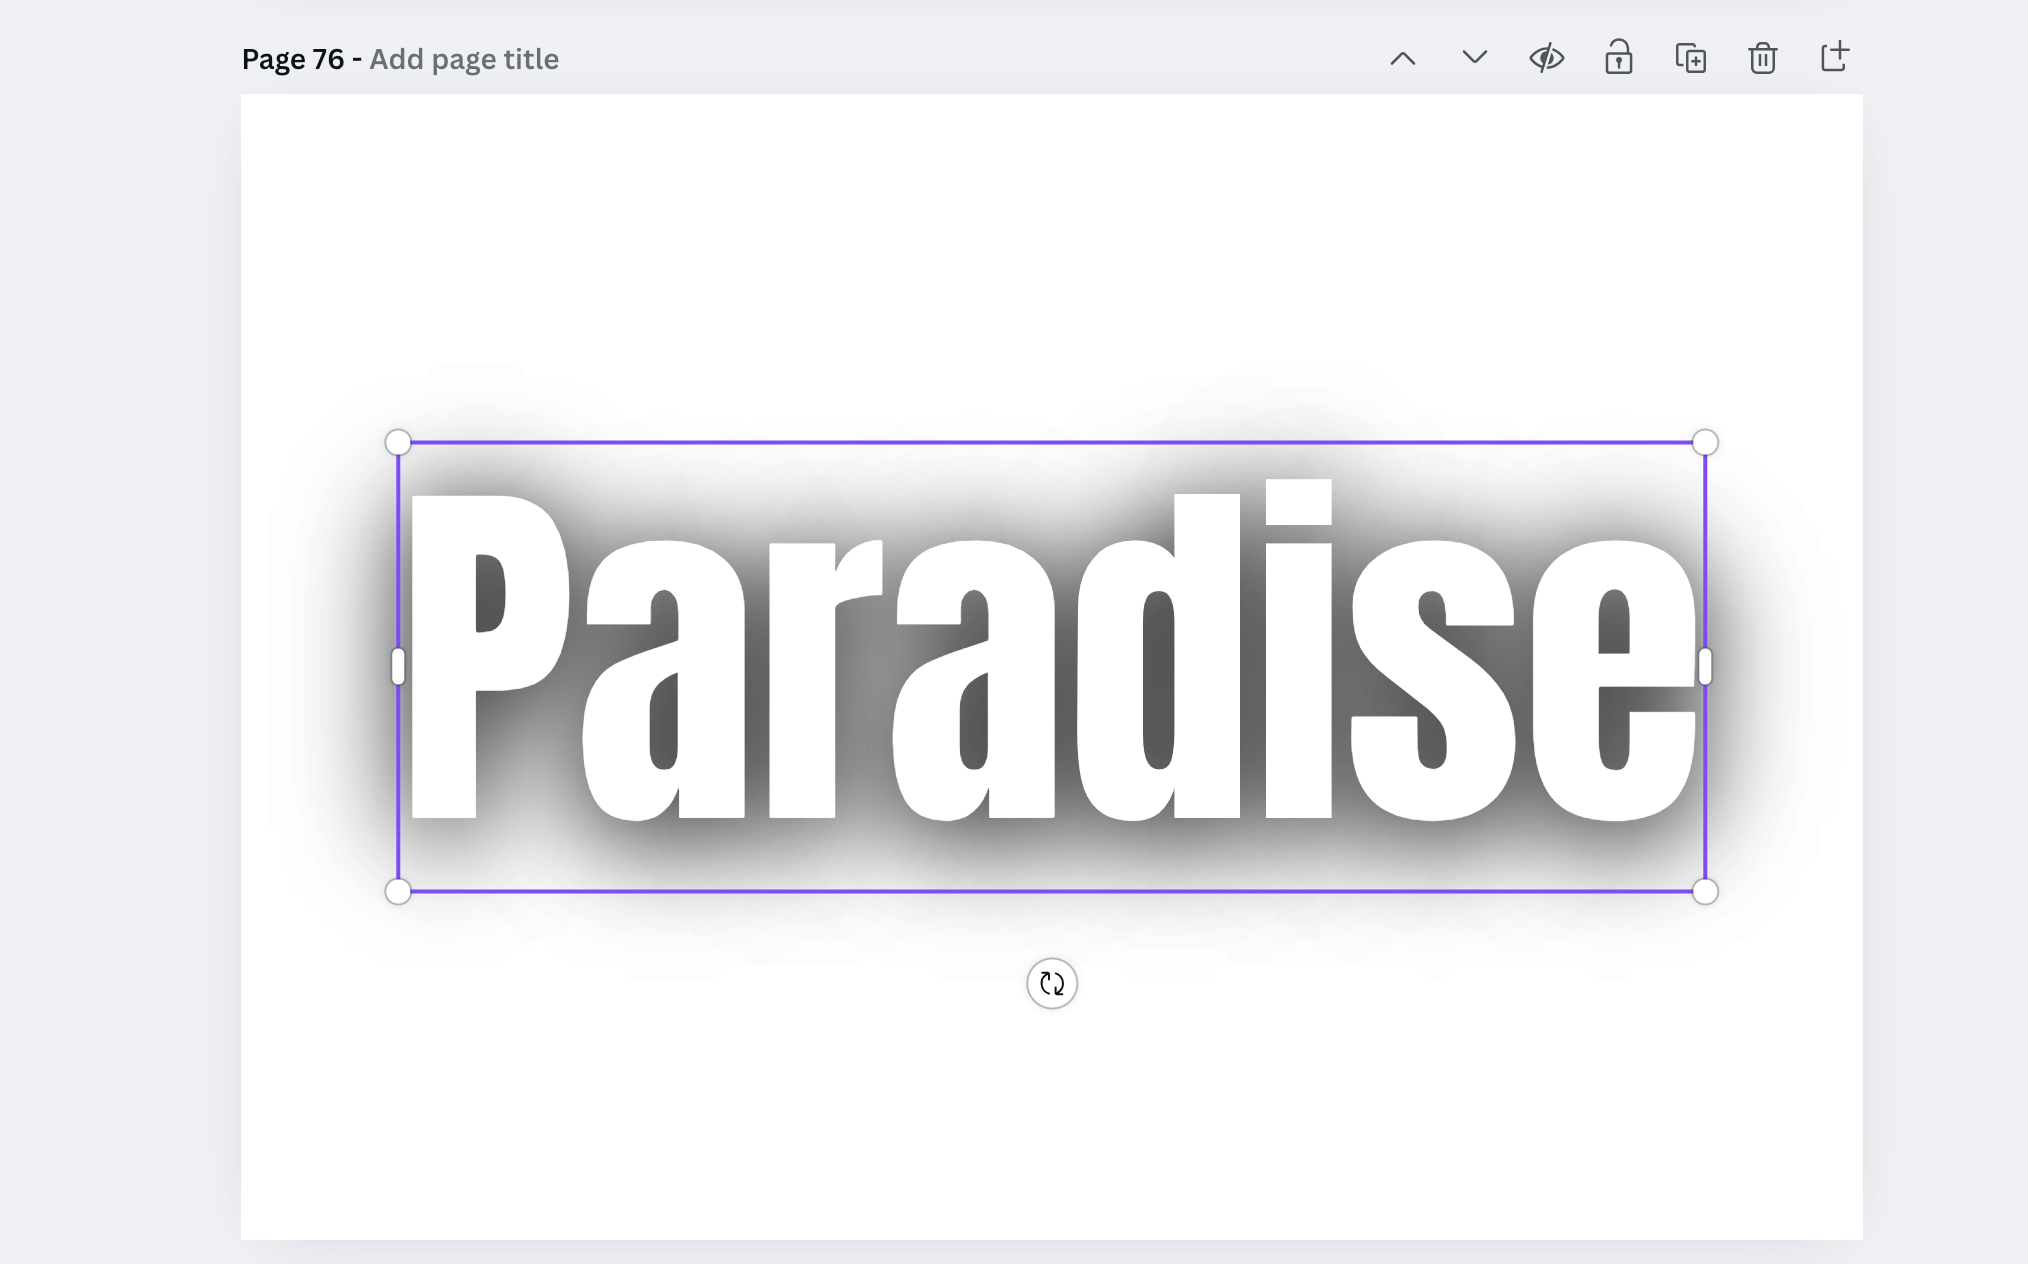
Carefully place the duplicate directly on top of the original text. This will darken the shadow, making the transparent effect more pronounced.
Depending on the background image you are planning to use, you may need to duplicate the text 2 or 3 times to achieve the desired shadow darkness.
5. Export Your Text as a PNG
Click "Share" in the top right corner.
Select "Download."
Choose "PNG" as the file type.
Download the PNG file.
6. Import Your Image and Text
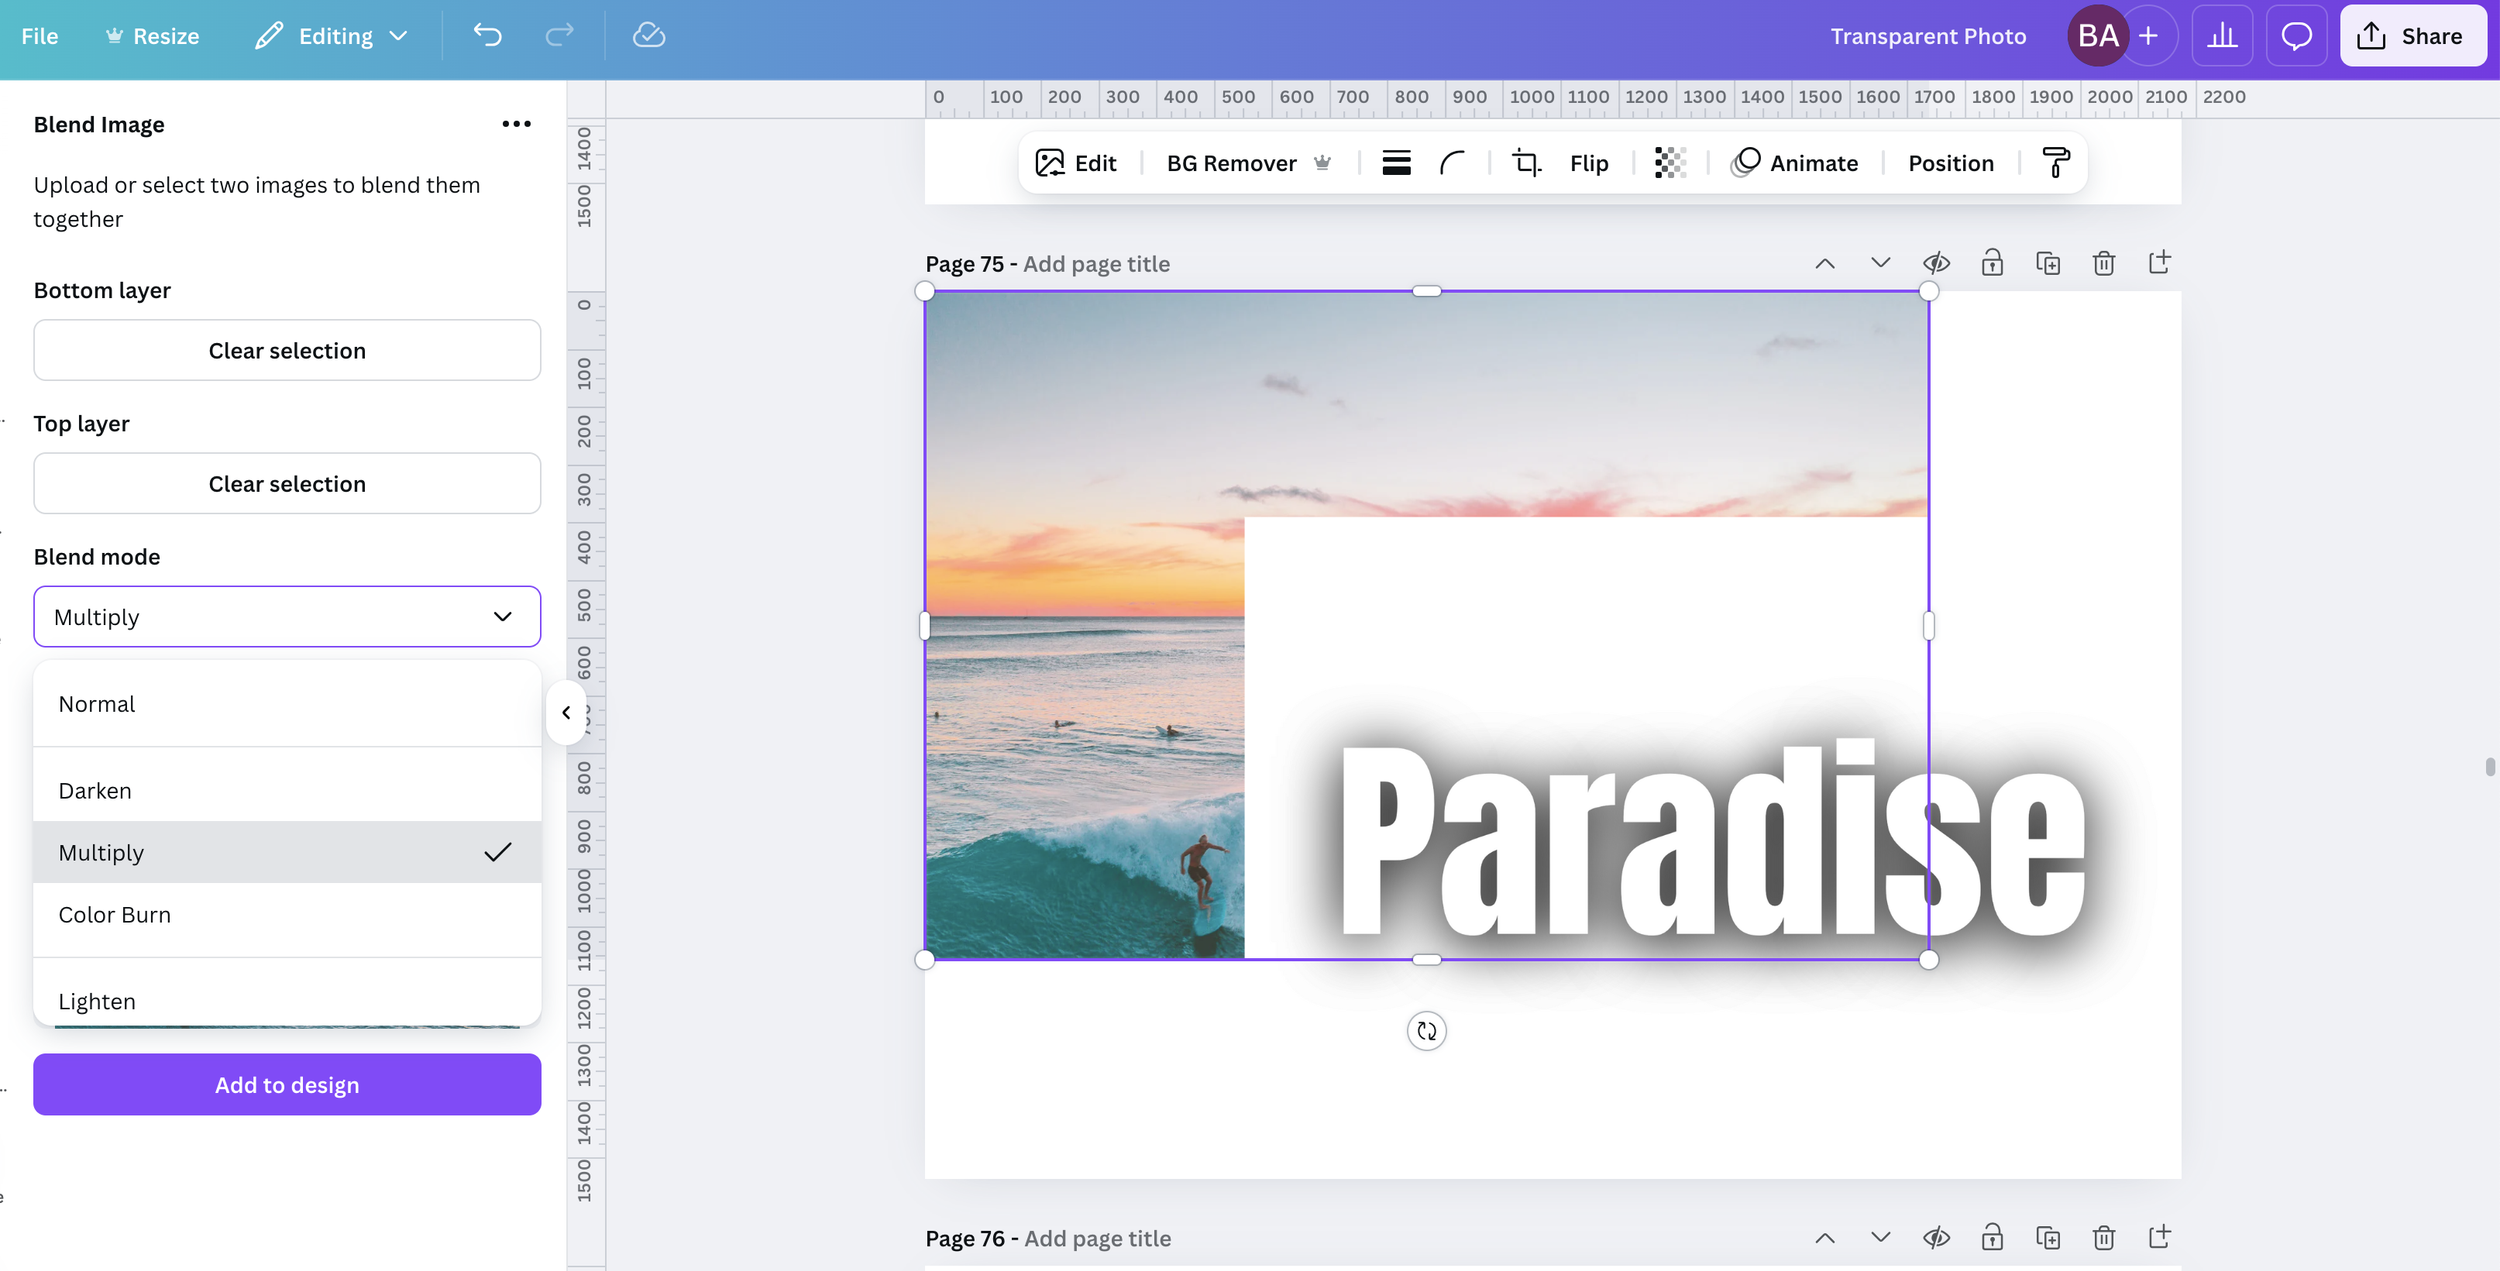
Upload both your background image and the PNG text file into a blank page. Adjust them so they are the same resolution.
7. Open the "Blend Image" App
On the left sidebar, click on "Apps."
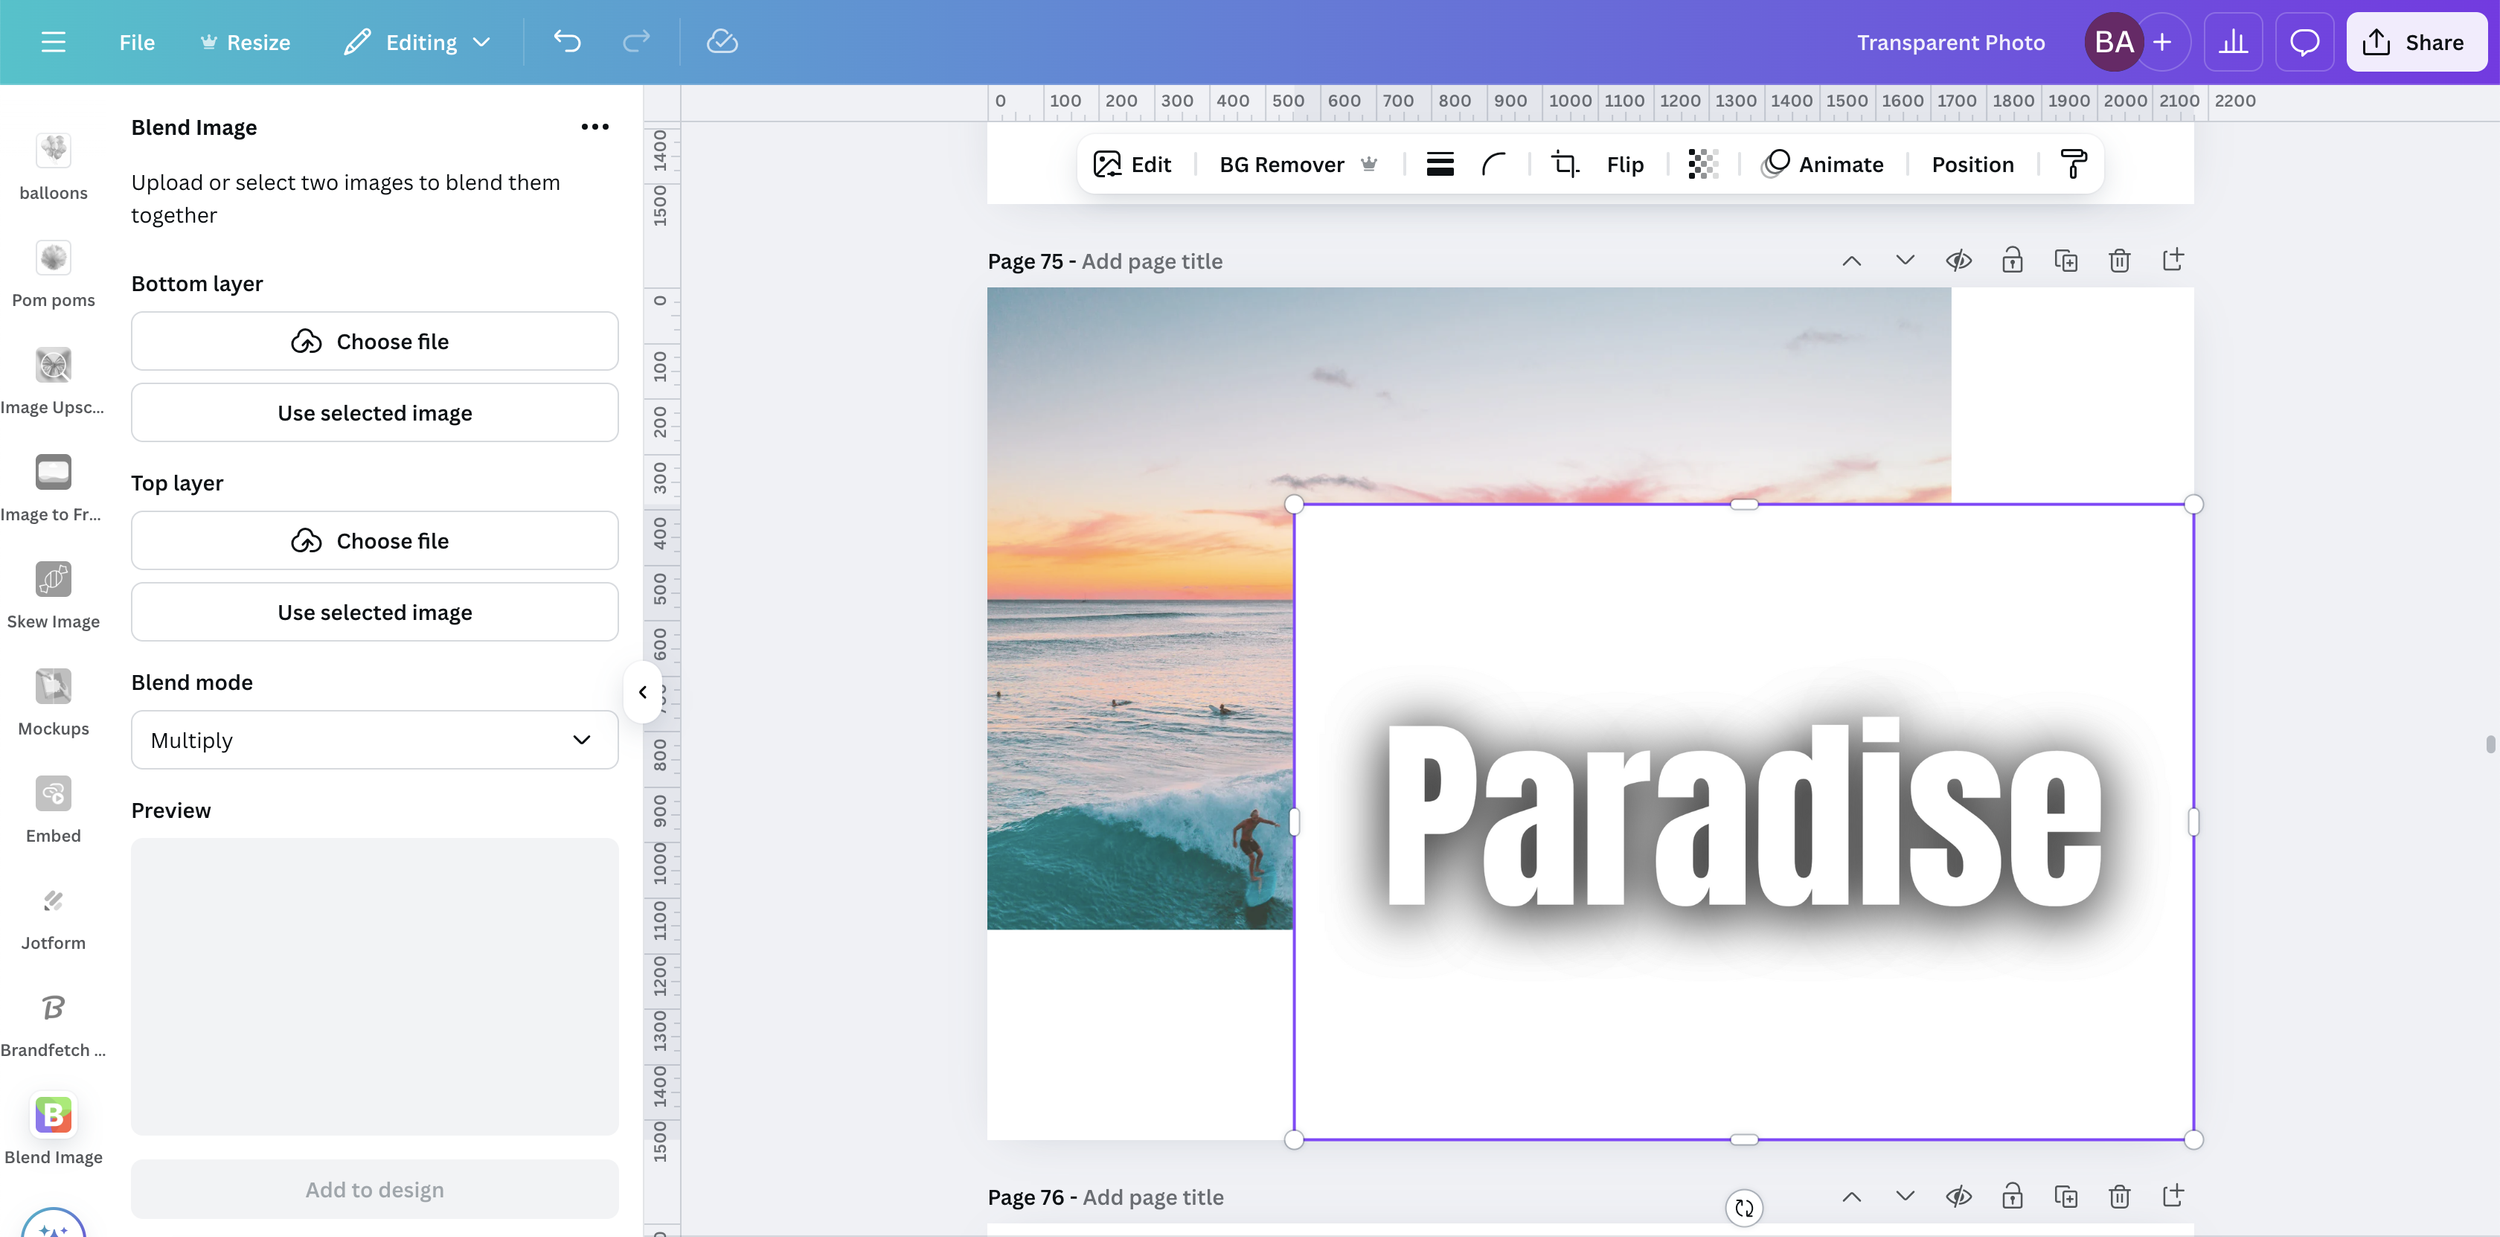
Search for and open the "Blend Image" app.
8. Configure the Blend Image App
In the app's configuration panel, select your background image as the "Bottom Layer."
Select your PNG text file as the "Top Layer."
9. Apply the "Multiply" Blend Mode
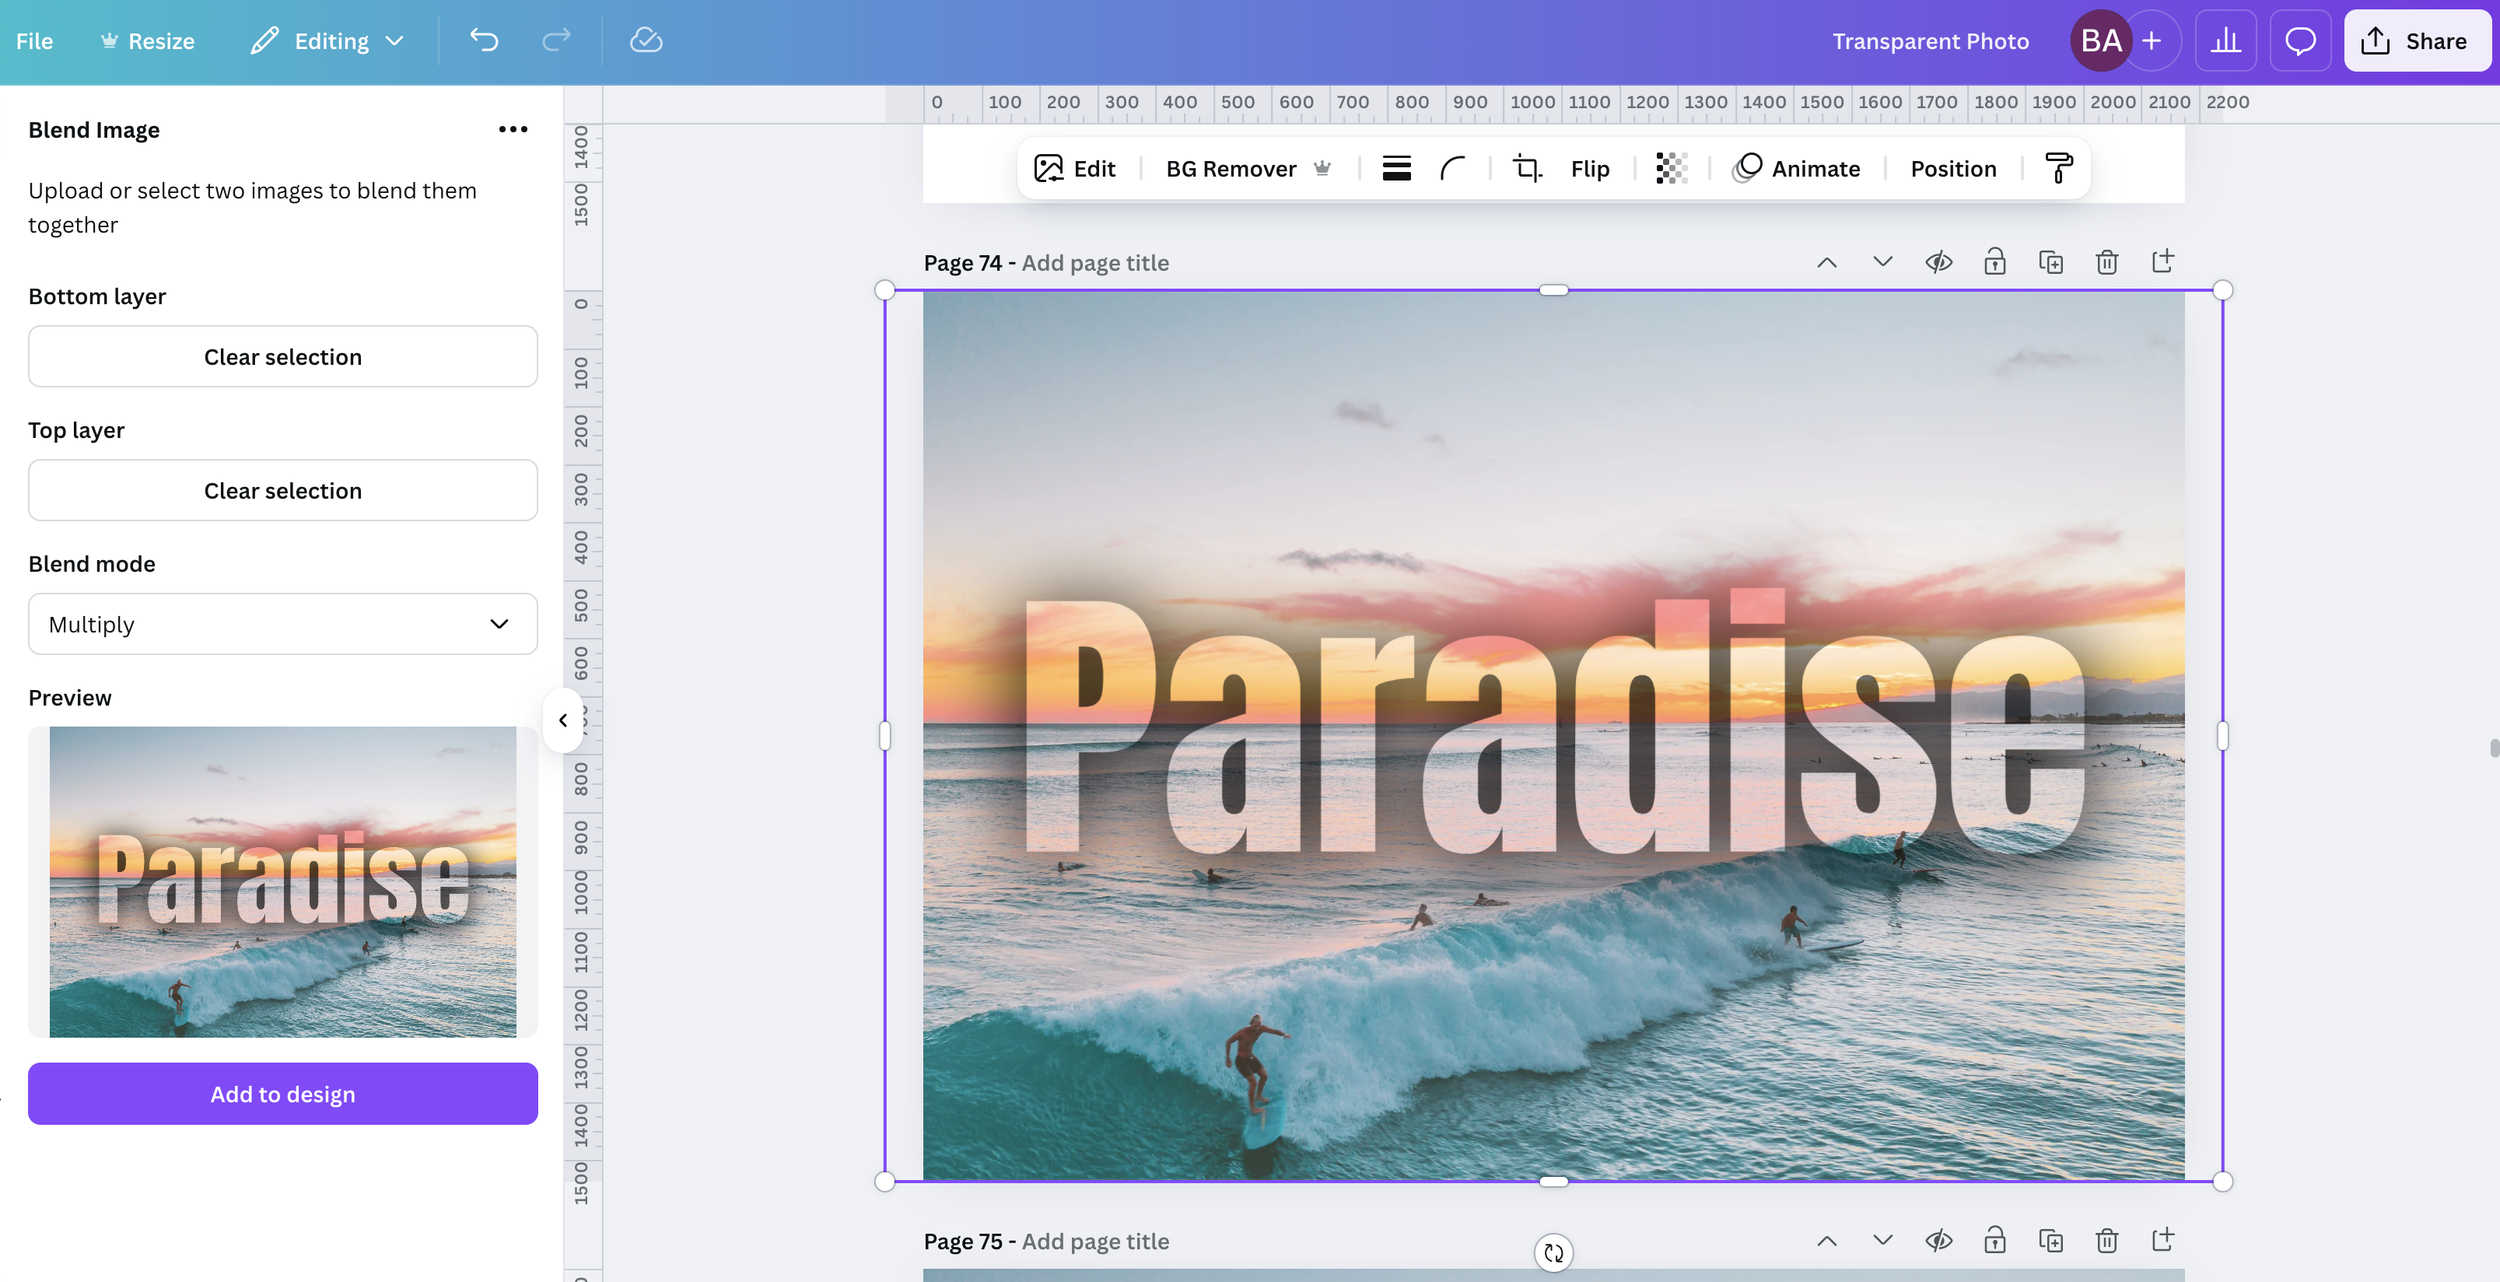
In the "Blend Mode" dropdown, choose "Multiply." This is the magic step that creates the transparent effect.
10. Preview and Add to Design
Check the preview to see how your overlay looks.
If you're happy with the result, click "Add to design."
Your image with the transparent text overlay is now ready! You can now download the image, or add it to any other design you are working on. That's it! With these simple steps, you can create stunning transparent text photo overlays in Canva. Have fun experimenting and making your designs truly stand out!

